Your First Motorcycle Track Day
If you have arrived here, you already know just how much fun motorcycles are. But maybe you’re also wondering just how fun they can be. Spoiler alert: a lot more fun! It’s great to push the limits of your riding abilities, but as they increase there are few places you can do so safely on public roads. Unpredictable surfaces, blind corners, animals, power poles, guardrails, oncoming traffic—these are all serious hazards to your health on public roads. But not on a track.
Getting on track can seem like a daunting challenge so I have created this article so you know what to expect your first time out there. I cover track day providers, bike preparation, gear selection, logistics, and a strategy for getting the most out of your first day at the track. There’s even a link in there to a free checklist you can download so you never forget a thing—for your track day anyway.
Finding a provider
First off, you’ll need to find a reputable organization conducting a track day. While those of us in the Bay Area are blessed with three amazing tracks; Laguna Seca, Sonoma Raceway, and Thunderhill, most likely you’re going to have one track within a reasonable distance. Look up their website. Most have a schedule of events. Track day providers rent out the track for usually one to three days. They are in charge of making sure riders are as safe as possible and having a good time at the track.
Once you’ve found their schedule, look for a suitable date. I highly recommend you look for a date that features a novice school, preferably two days long if you can swing it. How do you know if you need a novice school? For one, you’re reading this guide. If you’ve never been to the track, take the class. There is much to learn about going fast and all the good folks teaching are way faster than you are. Like, way faster. They will teach you how to be safe and you’ll get way more speed out of your time with them than that fancy carbon fiber and titanium do-dad you have your heart set on.
Unless the track is less than two hours from your house, get a hotel room nearby. The best thing you can do is get a good night’s sleep. You’re going to need all the energy and concentration you can muster because you are in for a physical and mental workout. The vigilance required on track can not be overstated.
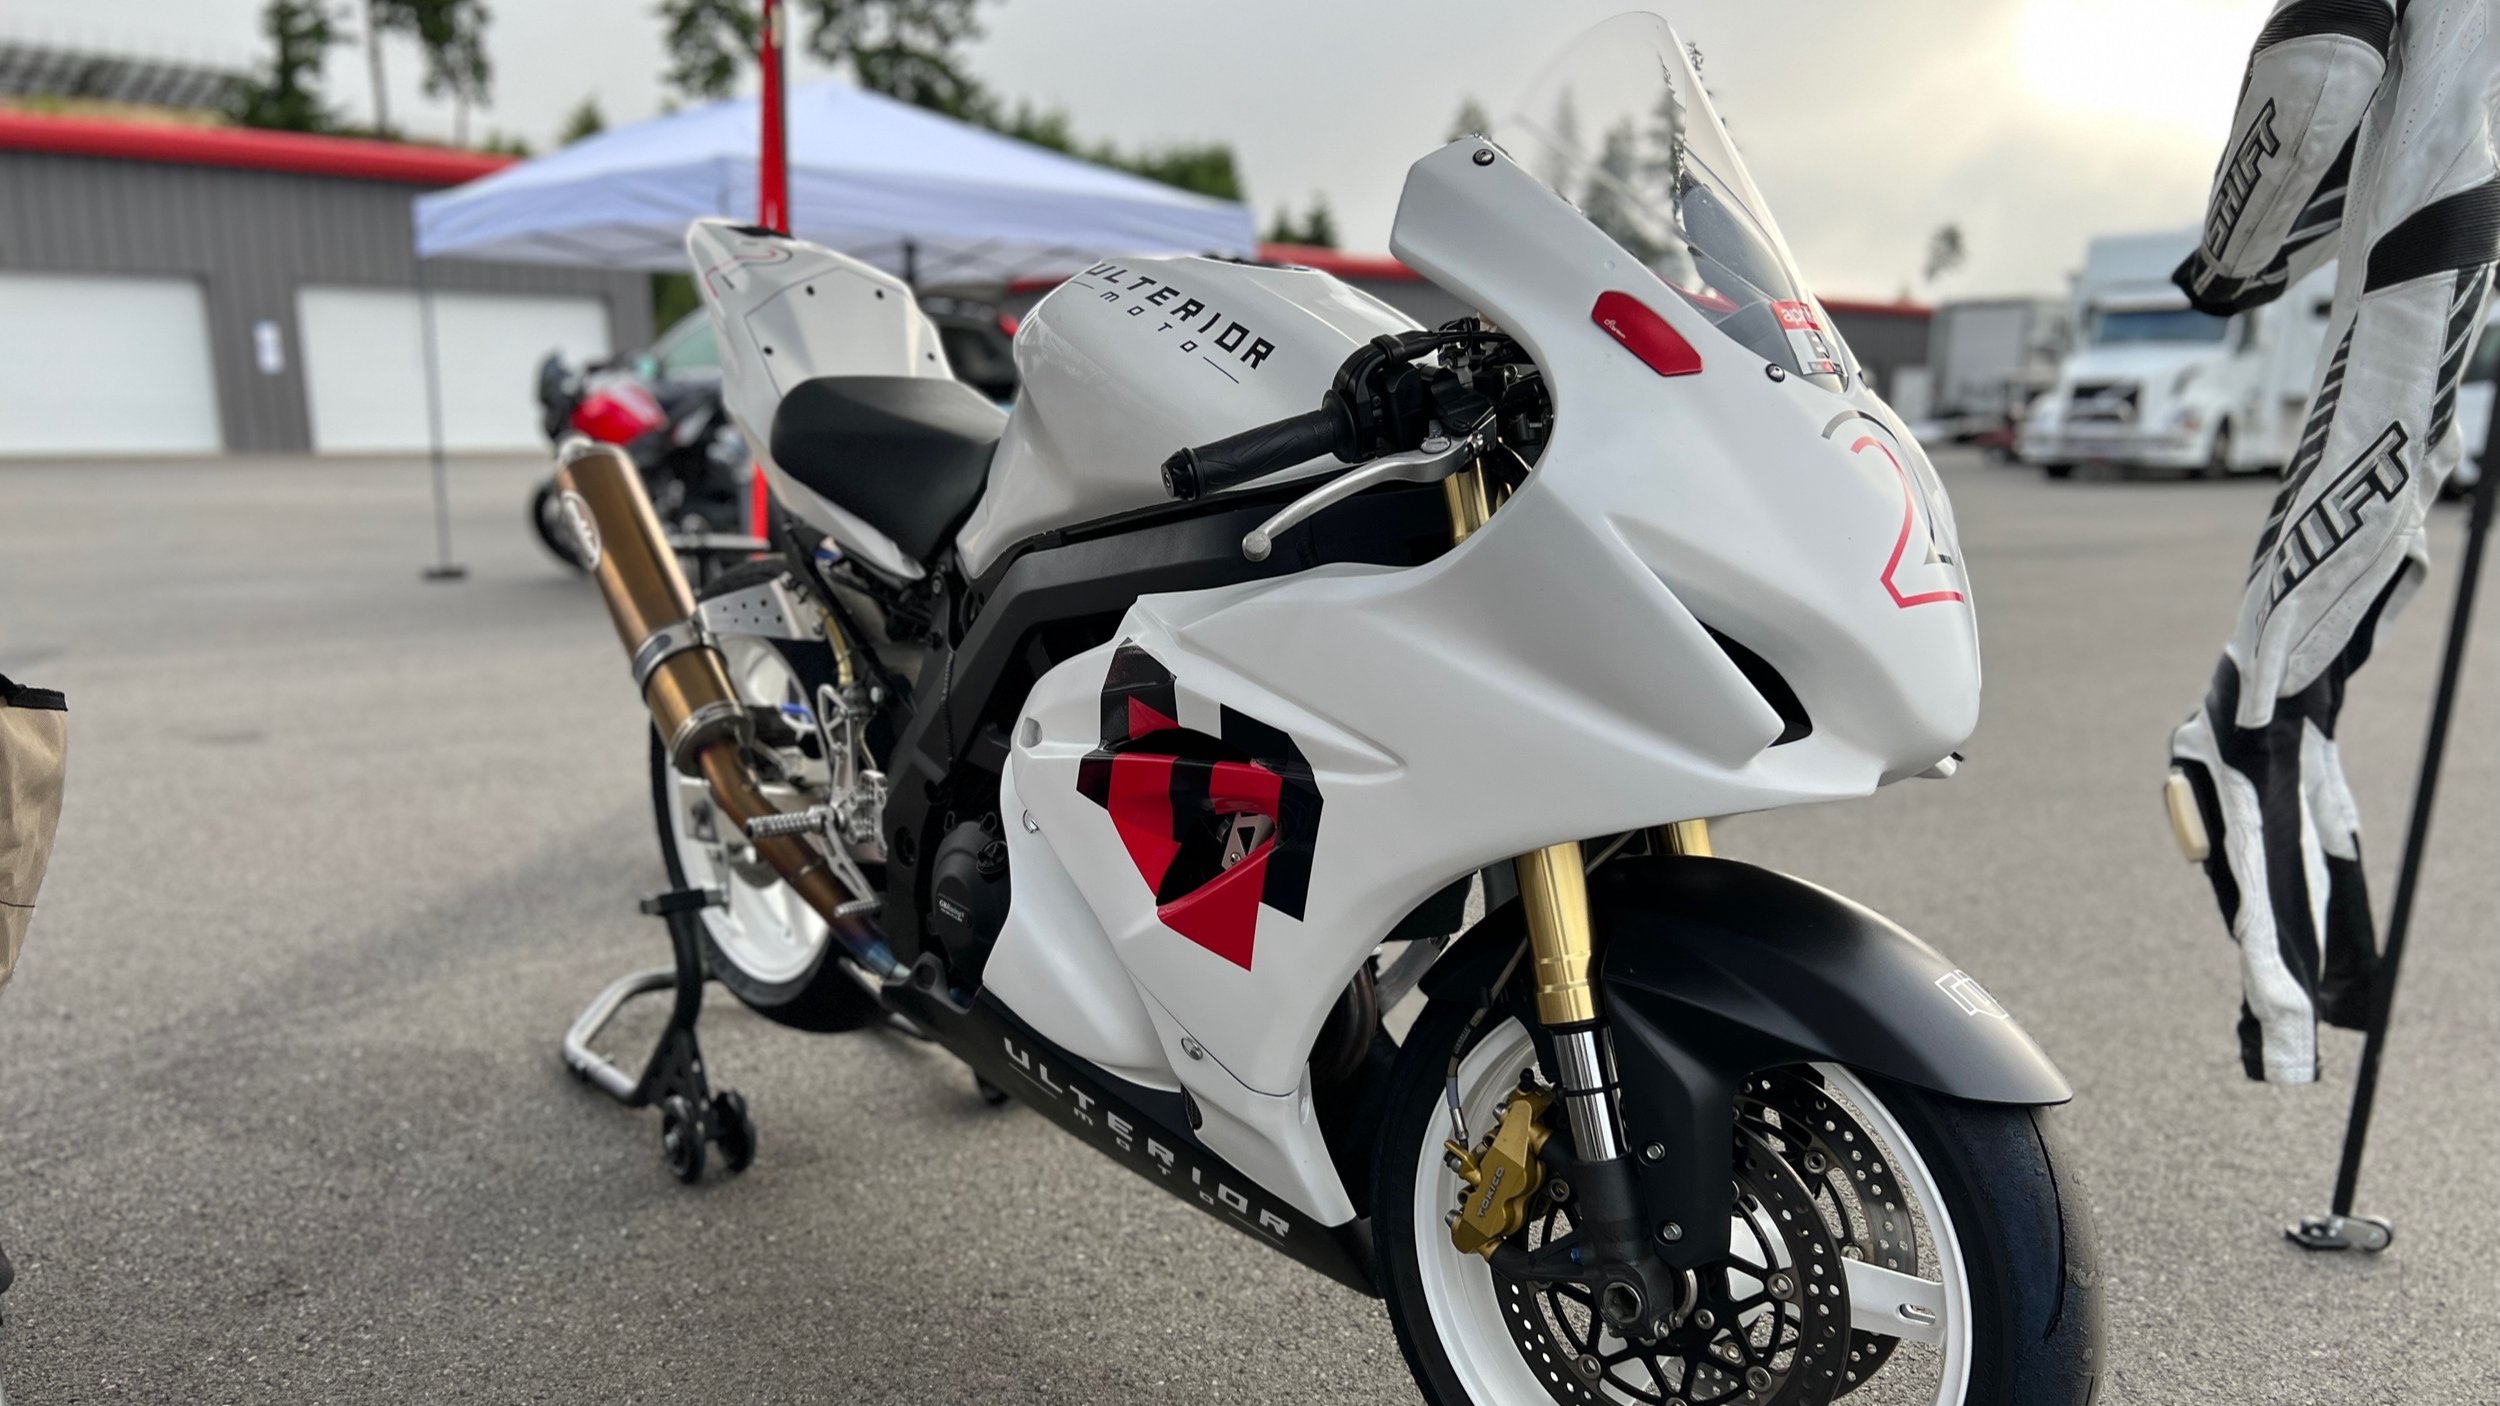
Prepping your bike
Is your bike street worthy? Your brake lever is firm, everything is securely attached, there’s tread on the tires, and the fluids are topped off and contained? If so, its track worthy. That said, you will want to do a few things before heading on circuit.
Three things your street bike has that you don’t want working on the track are functional headlights, brake lights, and mirrors. These need to be addressed because they are all distractions. The organizers don’t want you looking behind you and they don’t want approaching riders distracted by your brake lights. For a complete bike prep checklist, be sure to scour the website of your track day provider.
Lights
You have a few options with the lights; you can unplug the wiring to them, pull the fuse that powers them, or cover them with tape. While that last option is often the most straightforward, and it is acceptable, it is the least desirable. On most bikes the wiring is accessible and it’s pretty easy to disconnect. As for fuses, a brief internet search should tell you all you need to know if the fusebox lid doesn’t. Do either of these things and you won’t look like an amateur—even though you are. Lastly, is your headlight glass or plastic? If you answered “glass” at least tape an X shape over the lens. If you go down, nobody is going to want to run over glass shards. A decent tech inspector will send you back to the paddock if you haven’t taken care of that. A good way to cover a light is to lay down a layer of masking tape and cover that with a layer of duct tape as shown below. This prevents light from shining through the tape and is a breeze to remove.

Masking tape + duct tape technique shown, mirrors removed.
Mirrors
There are multiple mirror solutions as well. First and most preferable is to remove them altogether. Some bikes however, use the mirrors as an integral piece to keep the fairing and windscreen connected to the fairing stay. If this is the case for your bike, it is perfectly acceptable to run a zip tie through the holes. This may seem a bit slapdash, and yeah, no one is going to mistake it for a factory solution, but it works and its cheap and still better than the other option—that being folding them in and taping the glass. You can do that, but why not put a little bit of effort in and remove them entirely? Block off plates exist for this purpose if you dig the bling and want to spend the money.

Mirror block off plates like these (while not necessary) do give a nice finished appearance and mount the upper fairing securely to the stay, however zip ties are completely acceptable.
Some will also require that you tape down your wheel weights. They may have tape at the ready, but its better to be prepared. When you get done, consider taking that tape right off. Duct tape adhesive is no fun to remove and it only gets worse with time.
Protecting Yourself
There are a lot of things you are going to need at the track. The bike alone is certainly not sufficient, you’ll need to protect yourself as well. Gear is not typically part of the bike inspection process, but if the grid marshals see something unsafe, you won’t get past them.
Leathers
By now you have hopefully considered most of them, the most important being the suit. There is a wide variety of leathers to choose from, and prices to um…suit. You could find something used, but finding one that fits and is in good shape is going to consume a lot of your time. You are far better off heading out to your local shop and checking out what they have to offer. Resist the urge to purchase online. Leather suits are not terribly forgiving and being off even slightly can be sufficient to change the octave of your voice. Most brands out there are sufficient quality, from the entry level brands like Italian-in-name-only Sedici to the high-end of actual Italians, Dainese and Alpinestars. While I personally wear a long since out of production Shift Racing suit of my own design, my next suit will likely be a custom from Bison. Regardless of the brand, seriously consider an air-bag compatible suit. You will probably find yourself attending track days with increasing frequency and may find yourself wanting to invest in your protection. Another decision you will need to make is the one- or two-piece design. I don’t see a lot of two-piece leathers at the track, but you can’t deny the versatility of the concept. I have never used one myself because I like to dress according to my riding and I never go all out on my upper body only to leave my legs relatively unprotected.

A properly fit suit will allow you to assume some rather contorted positions.
Back Protector
The primary impact mitigating device for your body does not come with the suit. You have the choice of two basic designs; suit-integrated or stand-alone, and they each have their pros and cons.
By suit-integrated, I’m referring to the type that fit into a pocket in the liner of the suit. These are typically brand-specific meaning you’ll need to match the brand of the back protector to the brand of the suit. Each manufacturer has their own specific profile for the pocket and there’s no guarantee that mixing and matching is going to produce a usable result. This type is the most convenient. Getting all that gear on takes time and effort and if there’s a way to save on that, I’m all for it. Place your integrated back protector in your suit once and you're done. But if maximum protection is your goal, this type isn’t the best. The pocket to hold the back protector can only extend as far down as the stretch panel at the waist and that leaves a significant portion of your spine exposed to impact. Consider the image below. An integrated protector will provide coverage from about T1 to T12 if it is particularly long.
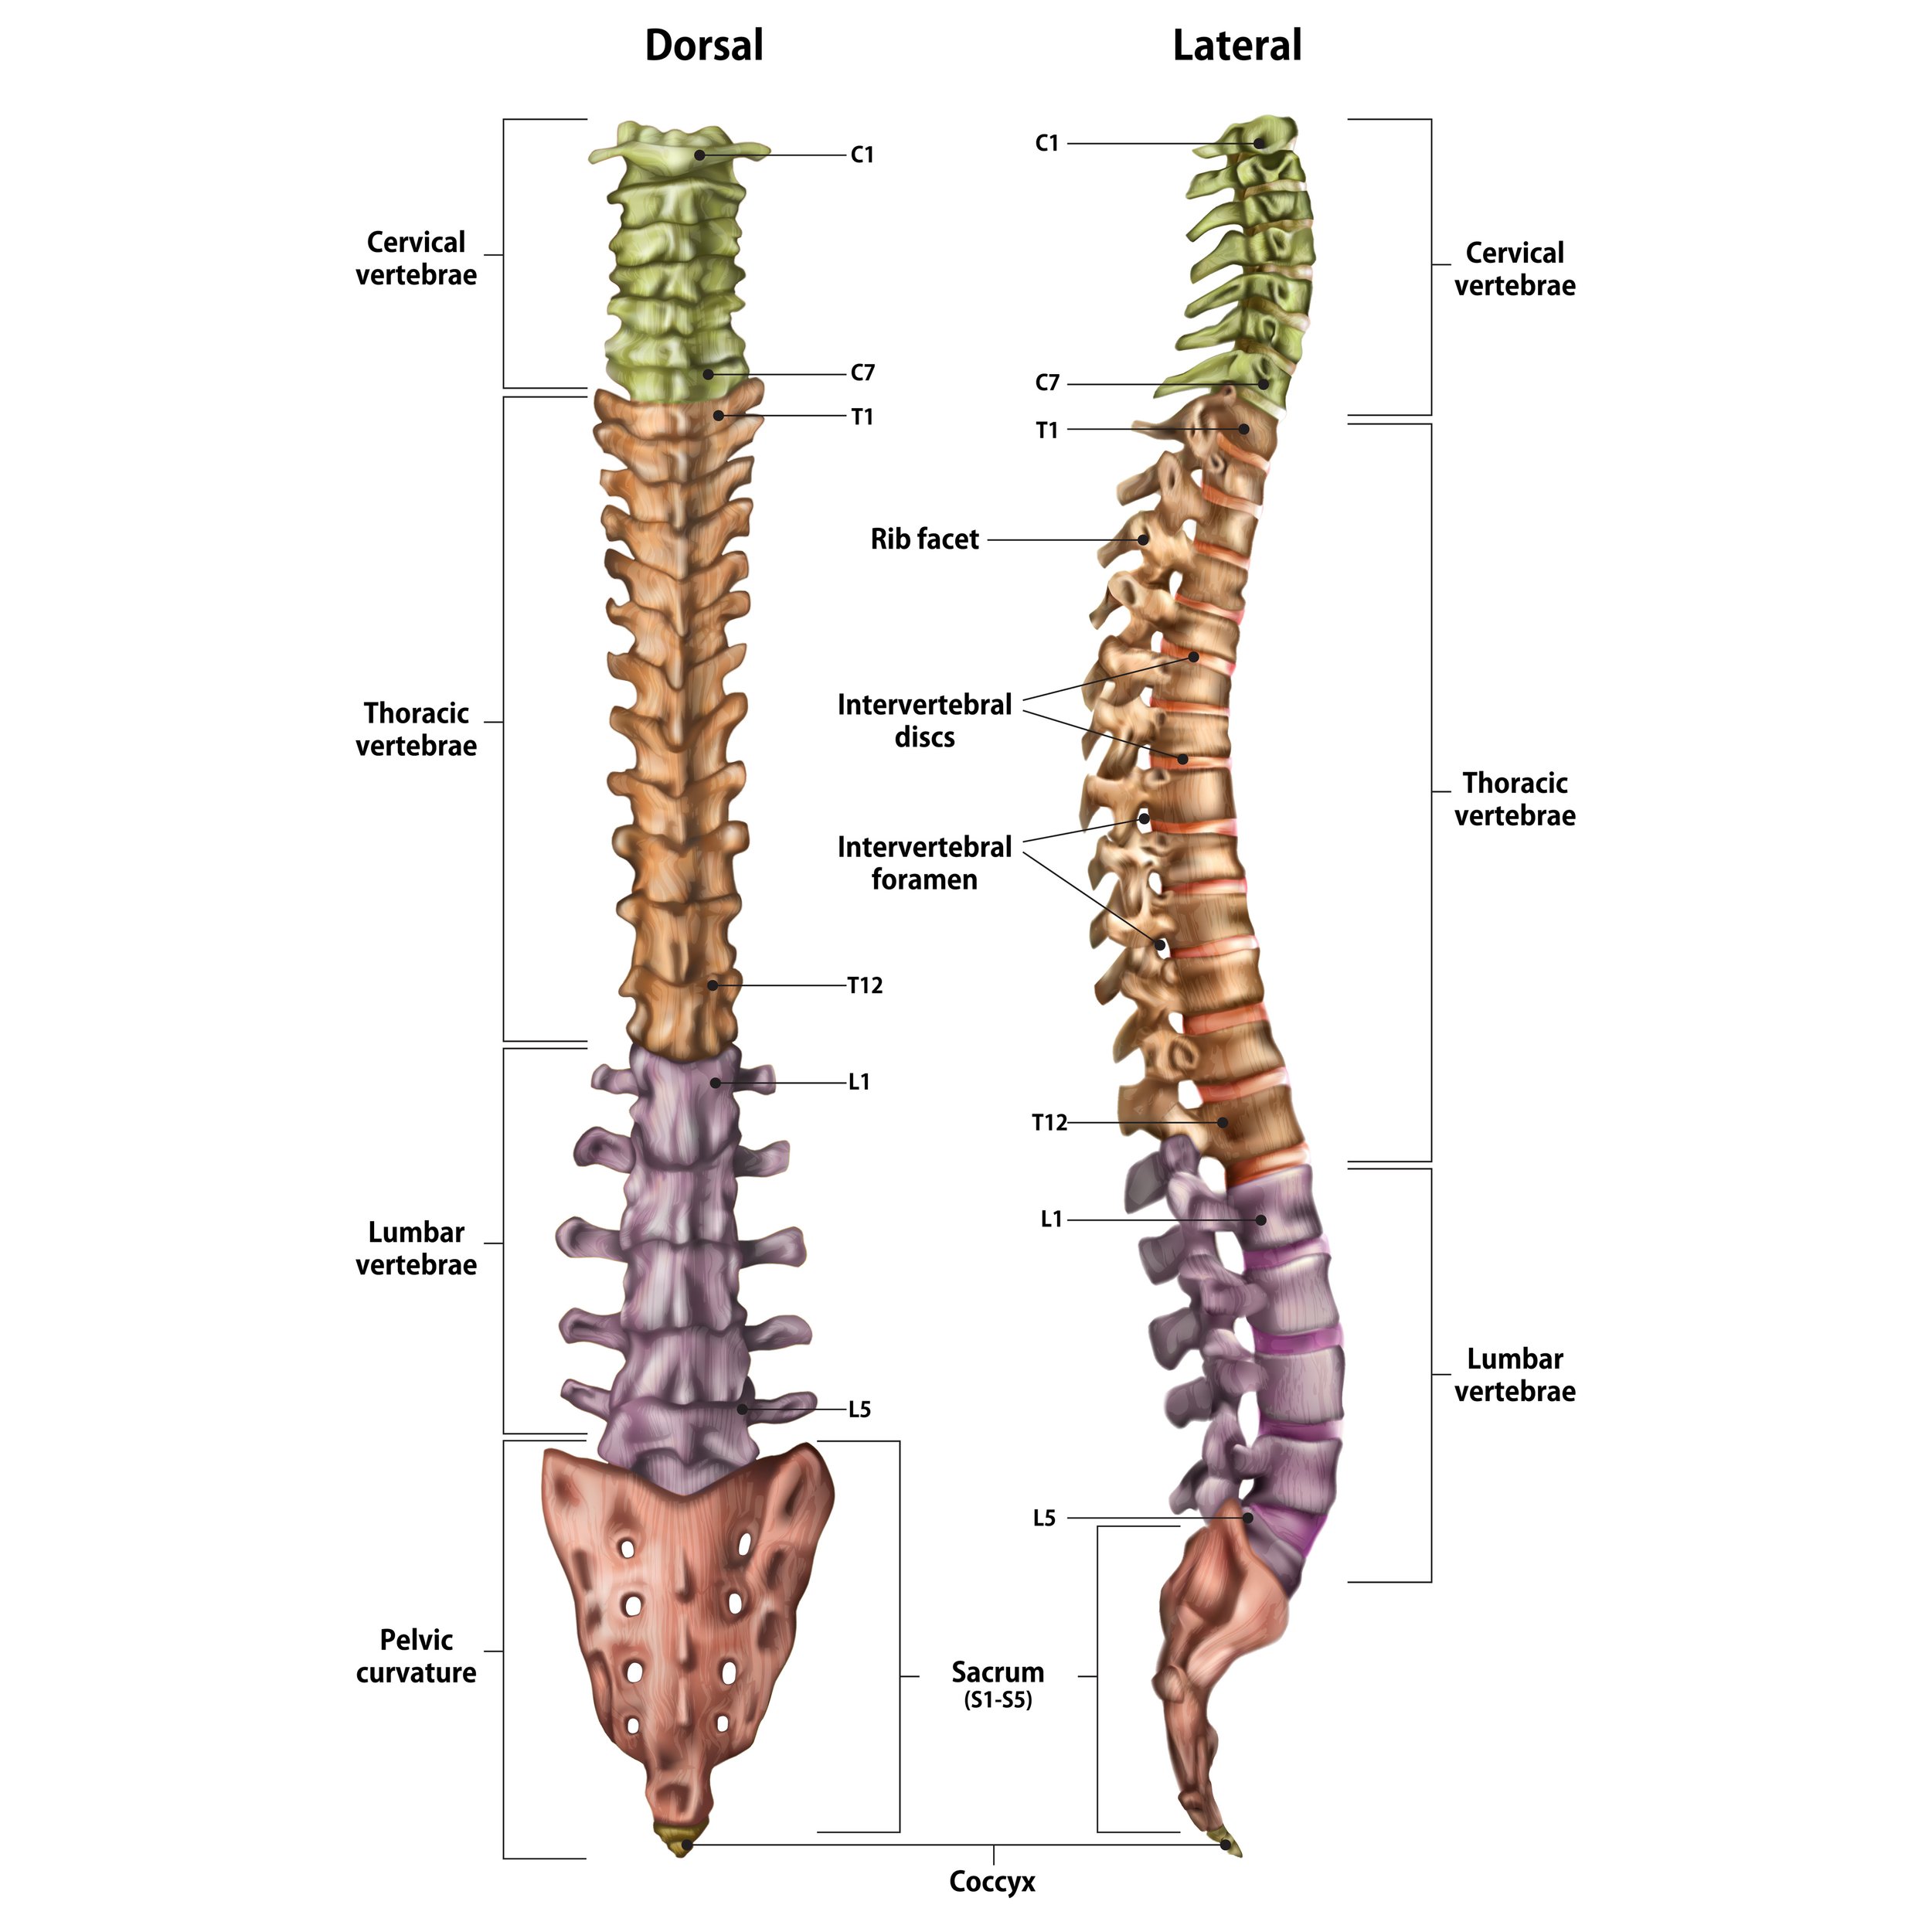
Stand alone back protectors, on the other hand, have no such limitations so they tend to offer more coverage, often as low as L5 or beyond to the sacrum. Here’s why that’s important to you. Your spinal cord is responsible for all of the various functions of your body. Protecting the thoracic section is life critical, but consider that the nerves housed in the lumbar section are what allow you to move your legs. Those in the sacrum control your bowels, bladder, and sex organs. The higher it gets severed, the more you lose. With a stand-alone style of back protector you have the freedom to pick the right protector for you, independent of suit features. The cons are bulk from the waist attachment and a little inconvenience getting suited up. Go with the one that best matches your priorities. What I can tell you from personal experience is to avoid back protectors with ridges, such as the Dainese Wave series. I went down at Thunderhill Turn 1, a fast 80 degree left. While the protector did a great job of keeping me safe, the peaks of the waves created lines of pressure rather than an even distribution. This resulted in shredding my leathers in multiple areas, wearing completely through them. Not an ideal scenario. I can’t believe they still sell these things.
Helmet
Any snug-fitting full-face helmet in good condition and manufactured in the last ten years is sufficient for your first track day. Fit is the most important quality to your lid and protecting its contents. Slide your helmet on without fastening the chin strap. Shake your head side-to-side and up-and-down. If the helmet slides around, go get yourself a new helmet. If it doesn’t, leave it on for ten minutes, then remove it and approach a mirror. Do you have red marks on your forehead? If so, go to your local retailer and perform these tests to ensure your new helmet fits correctly. You could also visit an online shop like Revzilla, but be prepared to ship one or more helmets back on your own dime. There are no sizing or shape standards and some brands—notably Arai—look to accommodate different head shapes with different shell shapes. The topic of which is safest is a never-ending argument, but in my opinion as a designer of multiple motorcycle helmets, those which meet the European ECE standard are slightly safer than those which meet the Snell standard. That, however is a topic for another day. The last major factor in helmets is the weight. Lighter is a bit nicer on the neck muscles, but it won’t make you faster. All things being equal, go with the most expensive helmet your budget allows, but prioritize fit and coverage over everything else.
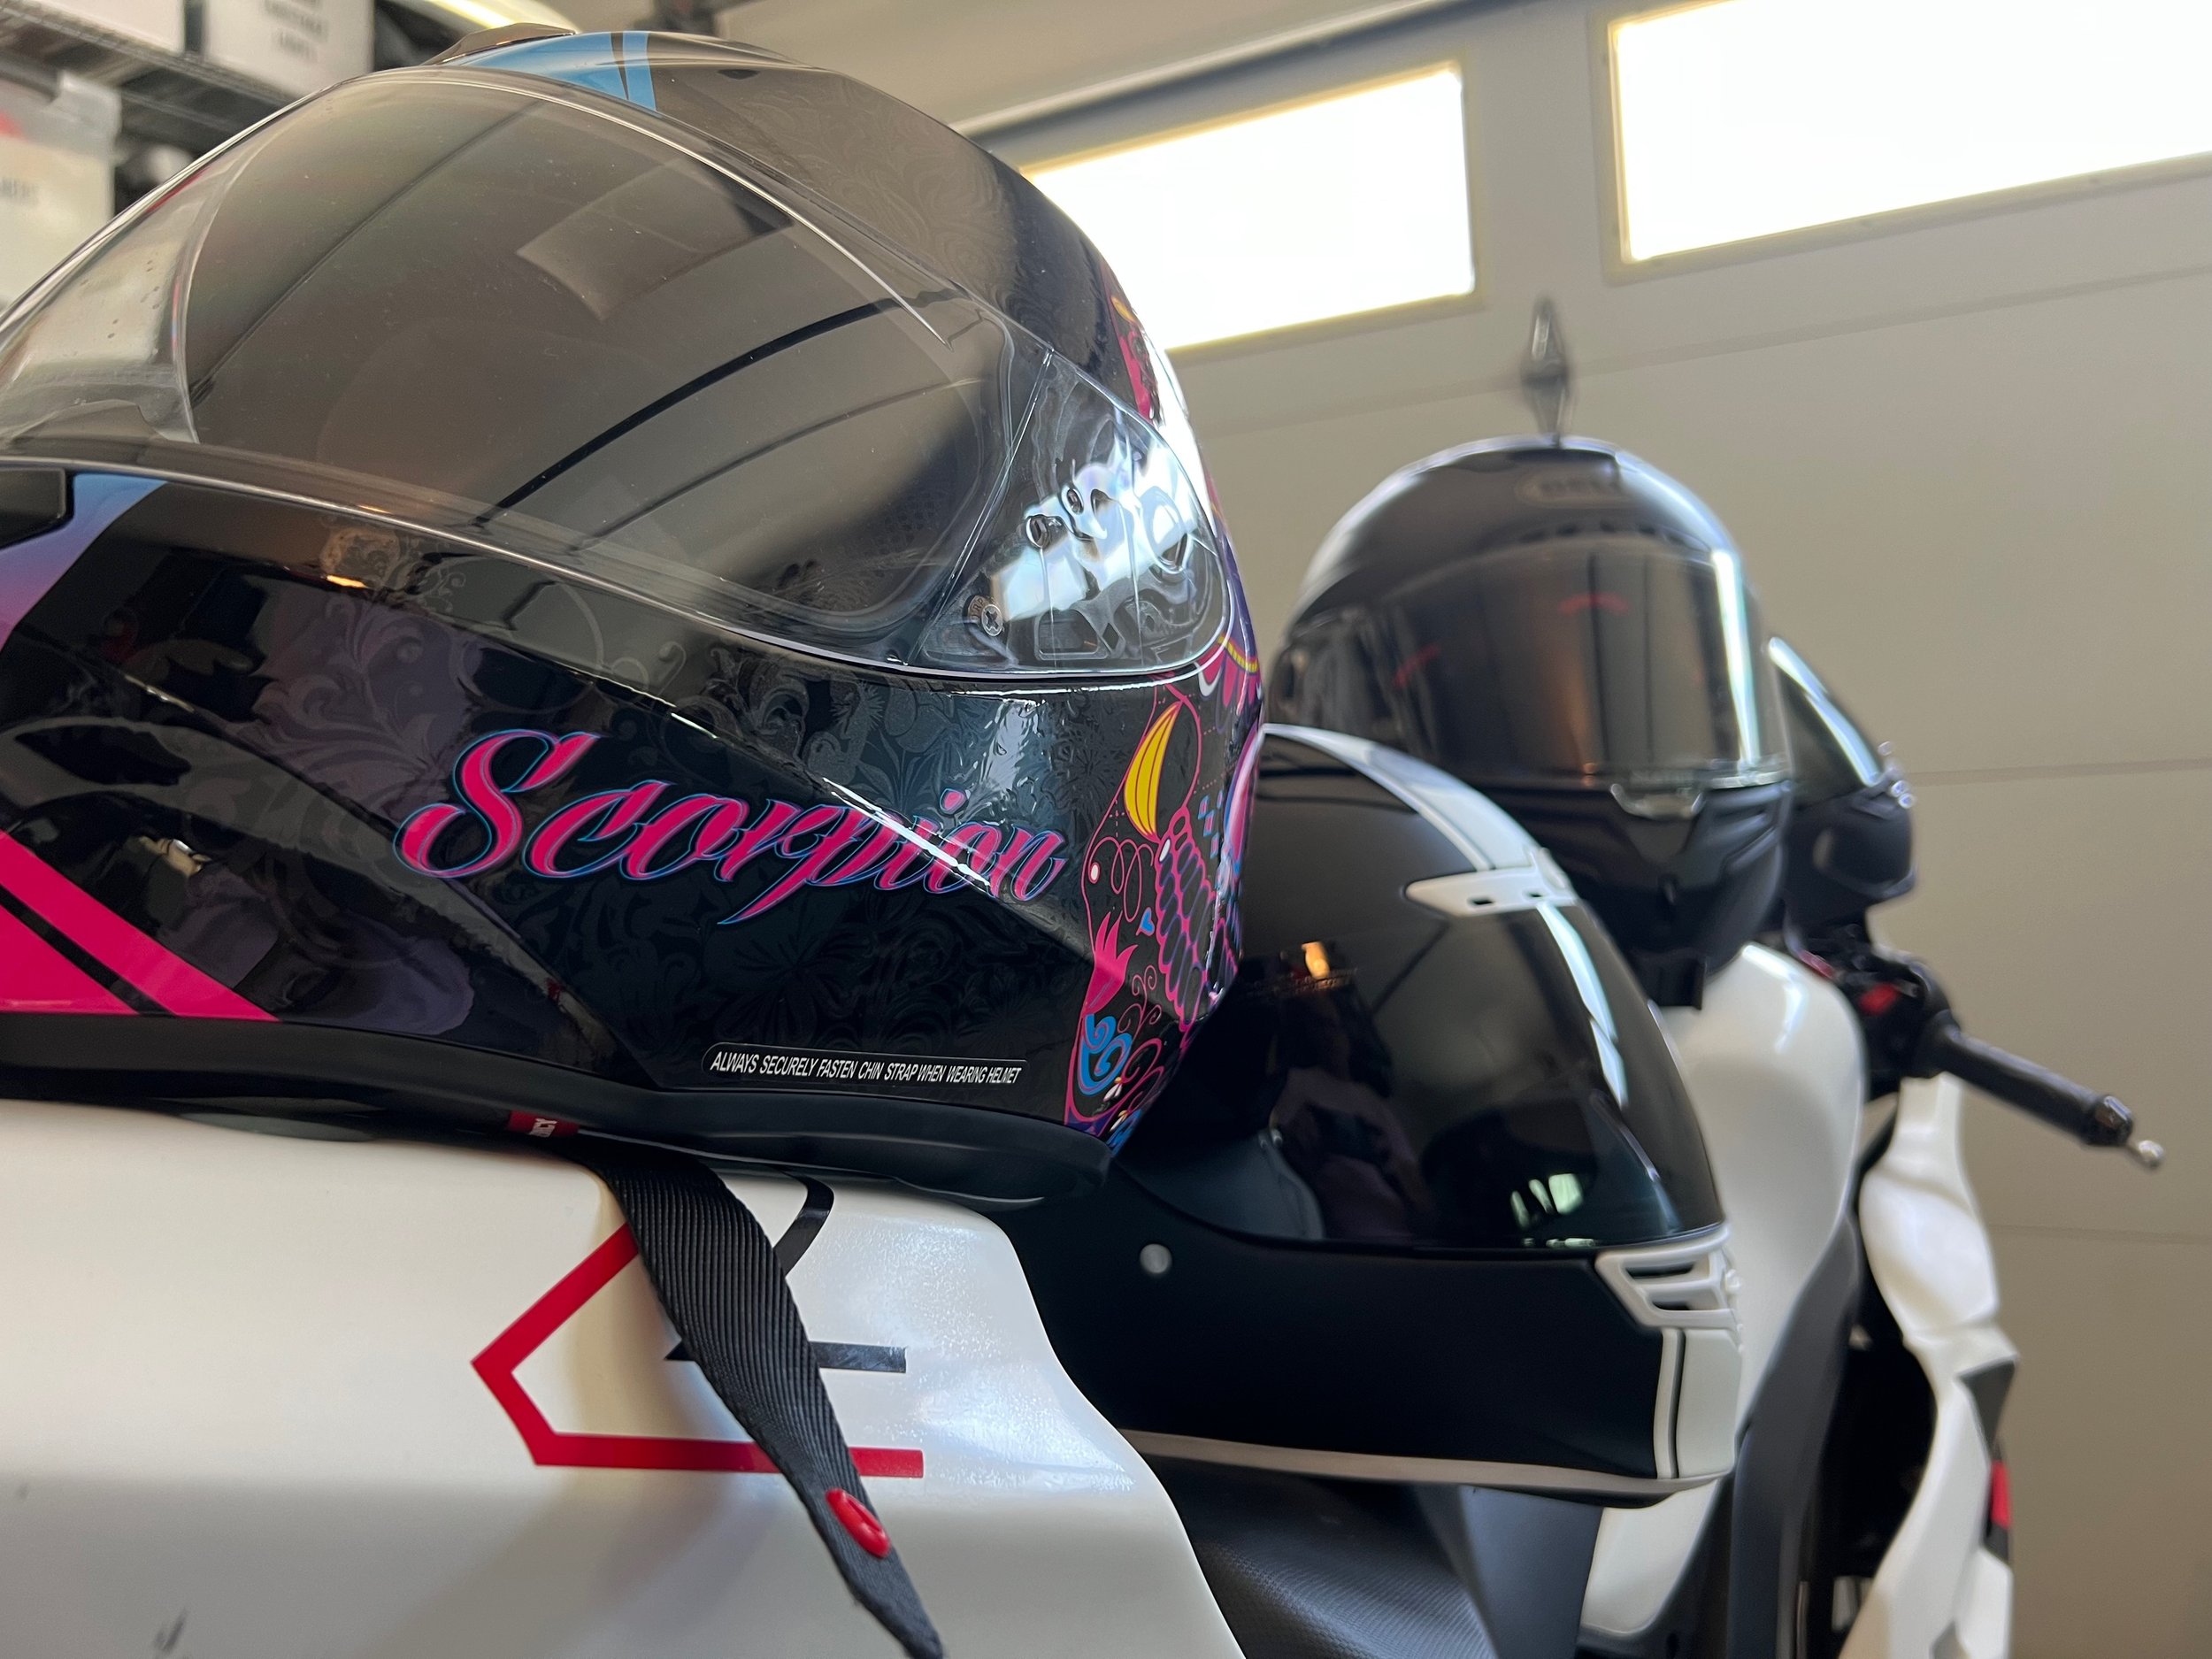
The family’s collection of helmets ranging in price from $195-$850. Guess which one sees the track.
Gloves
Properly fit, 100% leather, full gauntlet gloves are a must. The wrist cinch is crucial. Check that your gloves can not be pulled off your hand once comfortably cinched around your wrist. After all, a glove off the hand offers zero protection. Check your gloves for any cuts, splitting seems, or loose threads. Pay special attention to the finger panels (forchettes for you glove nerds) for stitching issues. If your glove shows any of these signs, invest in a new pair. Look for gloves that closely fit your hand and your wrist, but do not get gloves with fingers that are too short. They will stretch in diameter but length never changes to a noticeable degree. If you are purchasing a new set for your track day, I highly recommend breaking them in on your next street ride. No product becomes an extension of yourself quite like a broken in pair of gloves.

The split in the leather is outside of the typical crash zone, but it was sufficient enough for me to retire them.
Boots
While you can technically get by with touring boots, a decent pair of race-level boots is good insurance against a foot or ankle injury. Racing boots will have a few properties that make them much safer than standard riding boots. One of the most obvious attributes is a sort of exoskeleton particularly visible on the lateral (outside) ankle. These are designed to prevent hyper extension and hyper flexion (this will tear the achilles, see Tomac, Eli) of the ankle joint as well as twisting motions. Secondly, they are designed to slide along the pavement in a crash. The last thing you want is for your foot to catch and send your body into rag doll mode. As with any racing gear, I highly recommend you try on boots at a retailer to see what you prefer. Personally, I have larger calves that make it difficult for me to zip up most boots. Fortunately I found the Dainese Torque 3 Out boots which are a little shorter than most boots and have a straight, rear entry zipper design that makes putting them on relatively easy. Be sure to walk around in the boots a bit, as you would any shoes you buy. While they won’t be comfortable for long hikes, make sure they don’t hurt to walk in them at the very least. You’ll be trekking to the bathroom, getting lunch, visiting vendors, etc. You want this to be bearable at least.
Getting there
Ah logistics, not sexy, but oh so necessary. It may not seem like the coolest thing, but what’s more critical than actually arriving? Knowing you have all your ducks in a row at the outset will set your mind at ease. You want your full attention on learning when you’re on track and not worrying about getting home. For that reason, I do not recommend riding your bike to the track. I have seen it done on rare occasion and I’m glad it wasn’t me doing it. There’s a lot to preparation that goes into an event like this and its not all that compatible with traveling lightly.
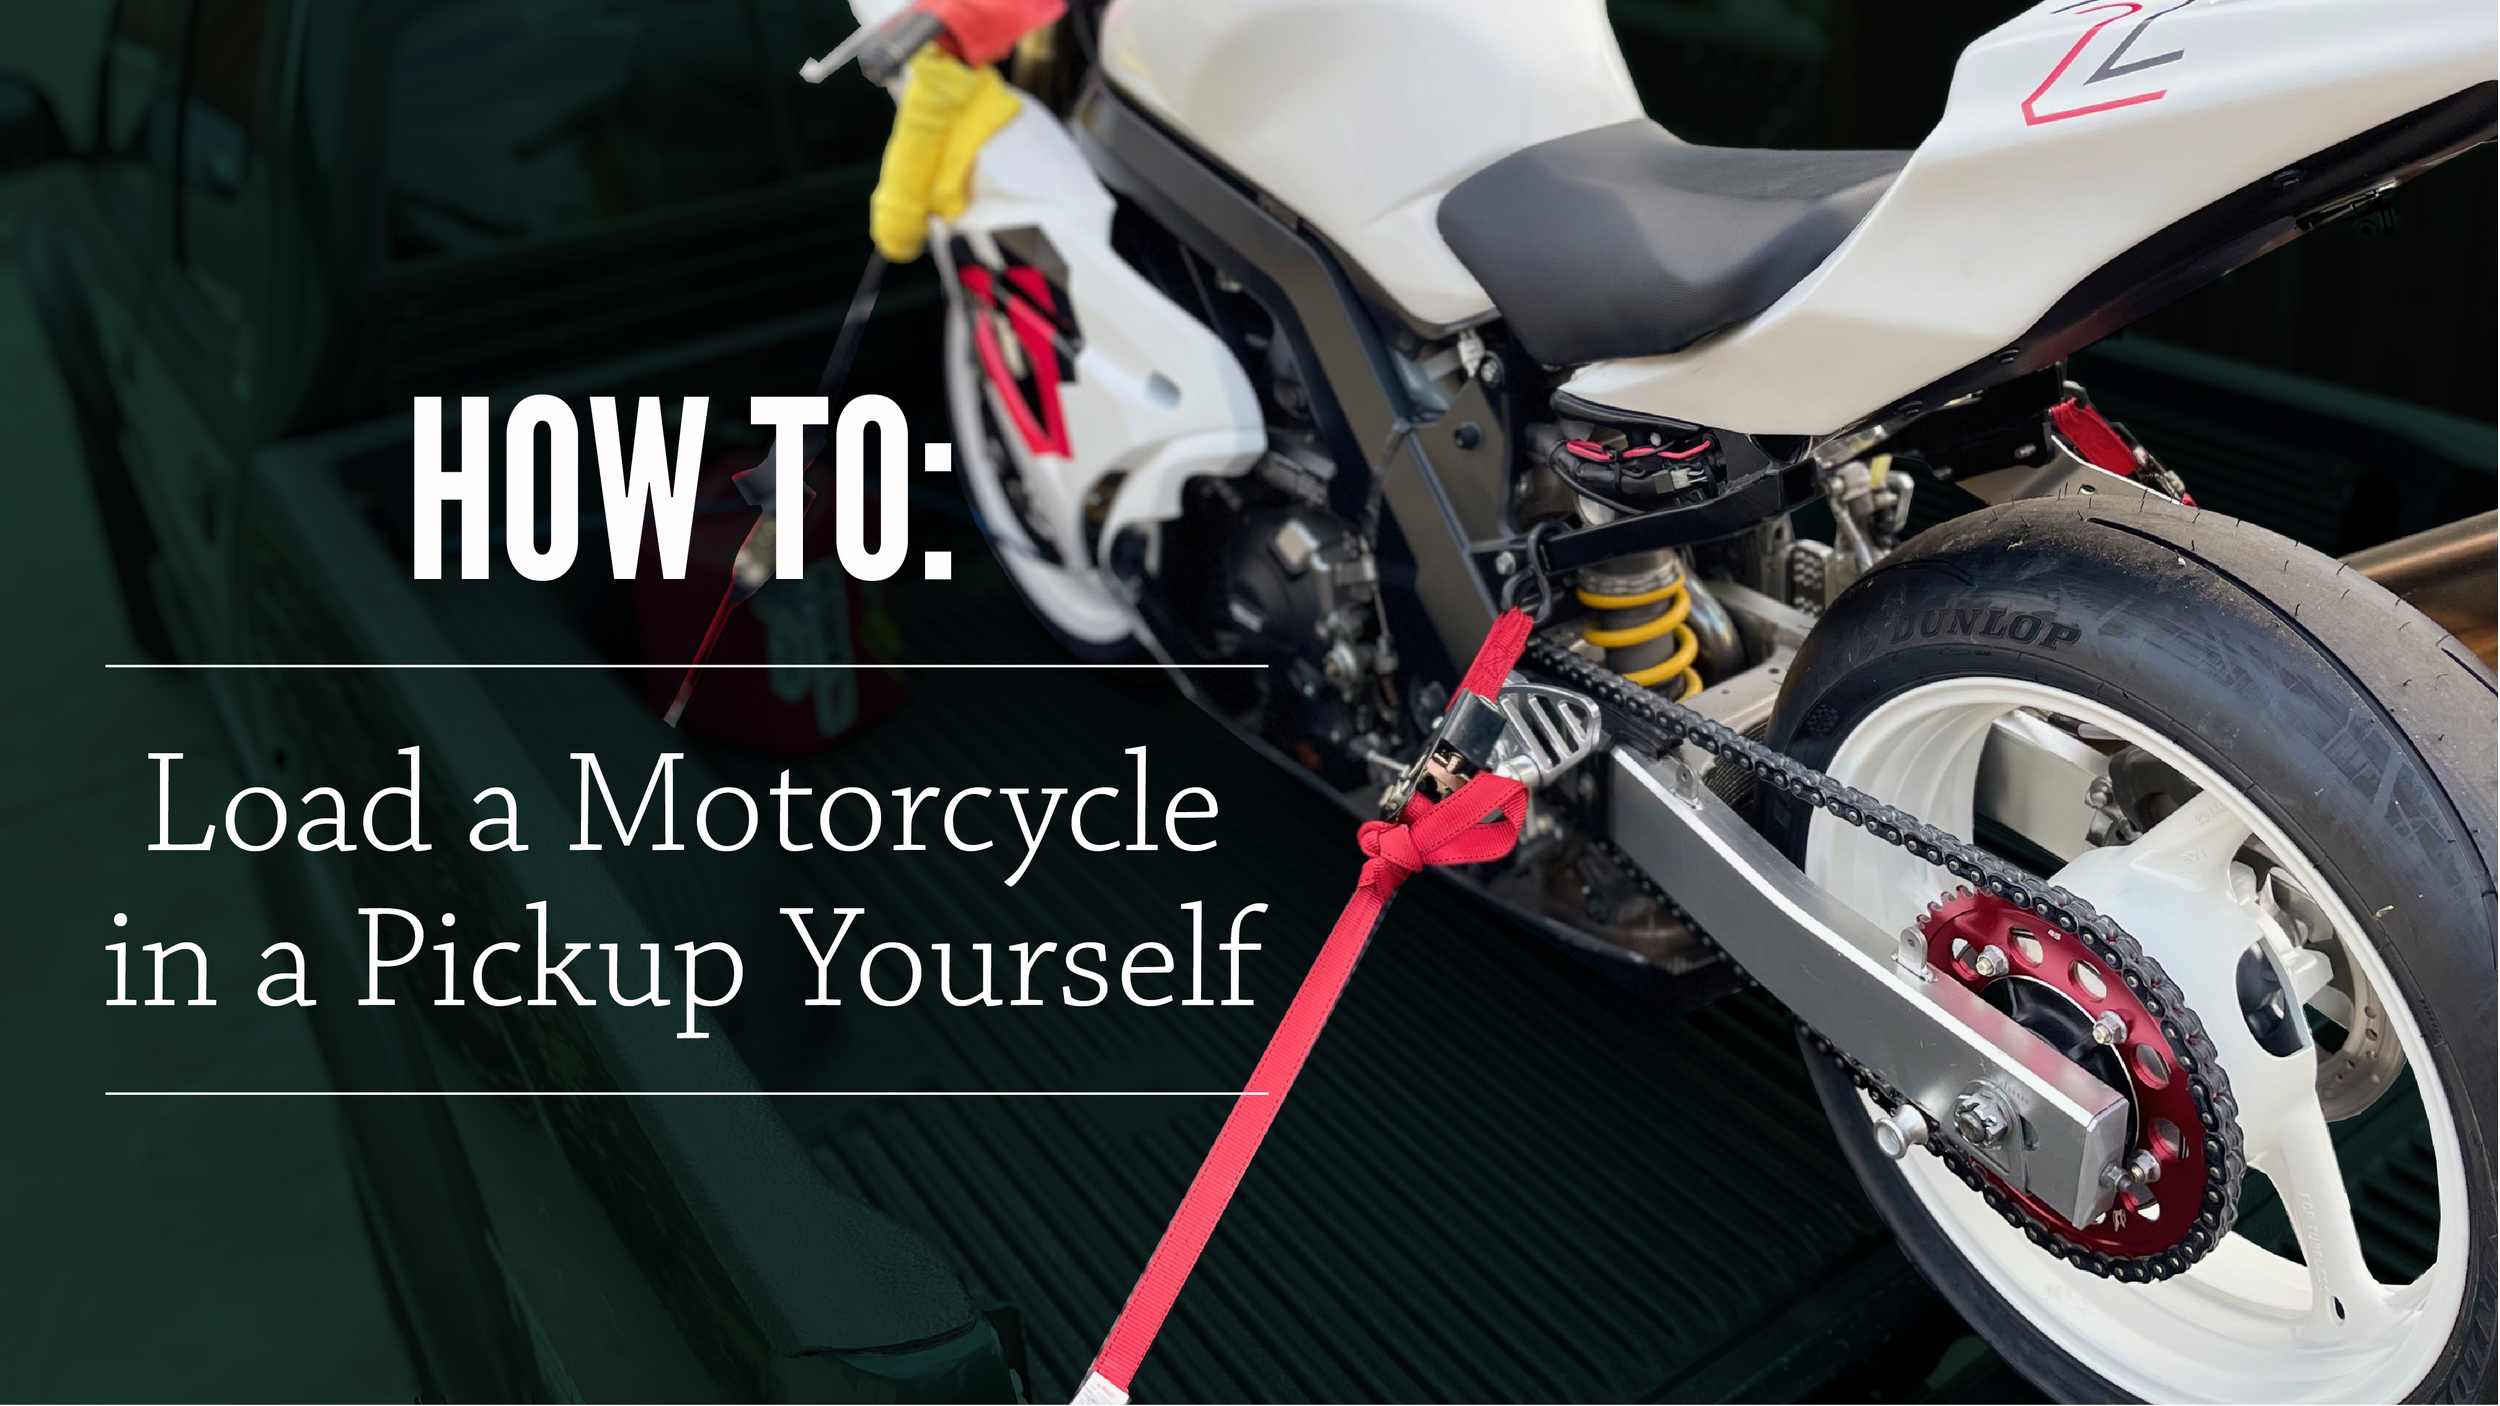
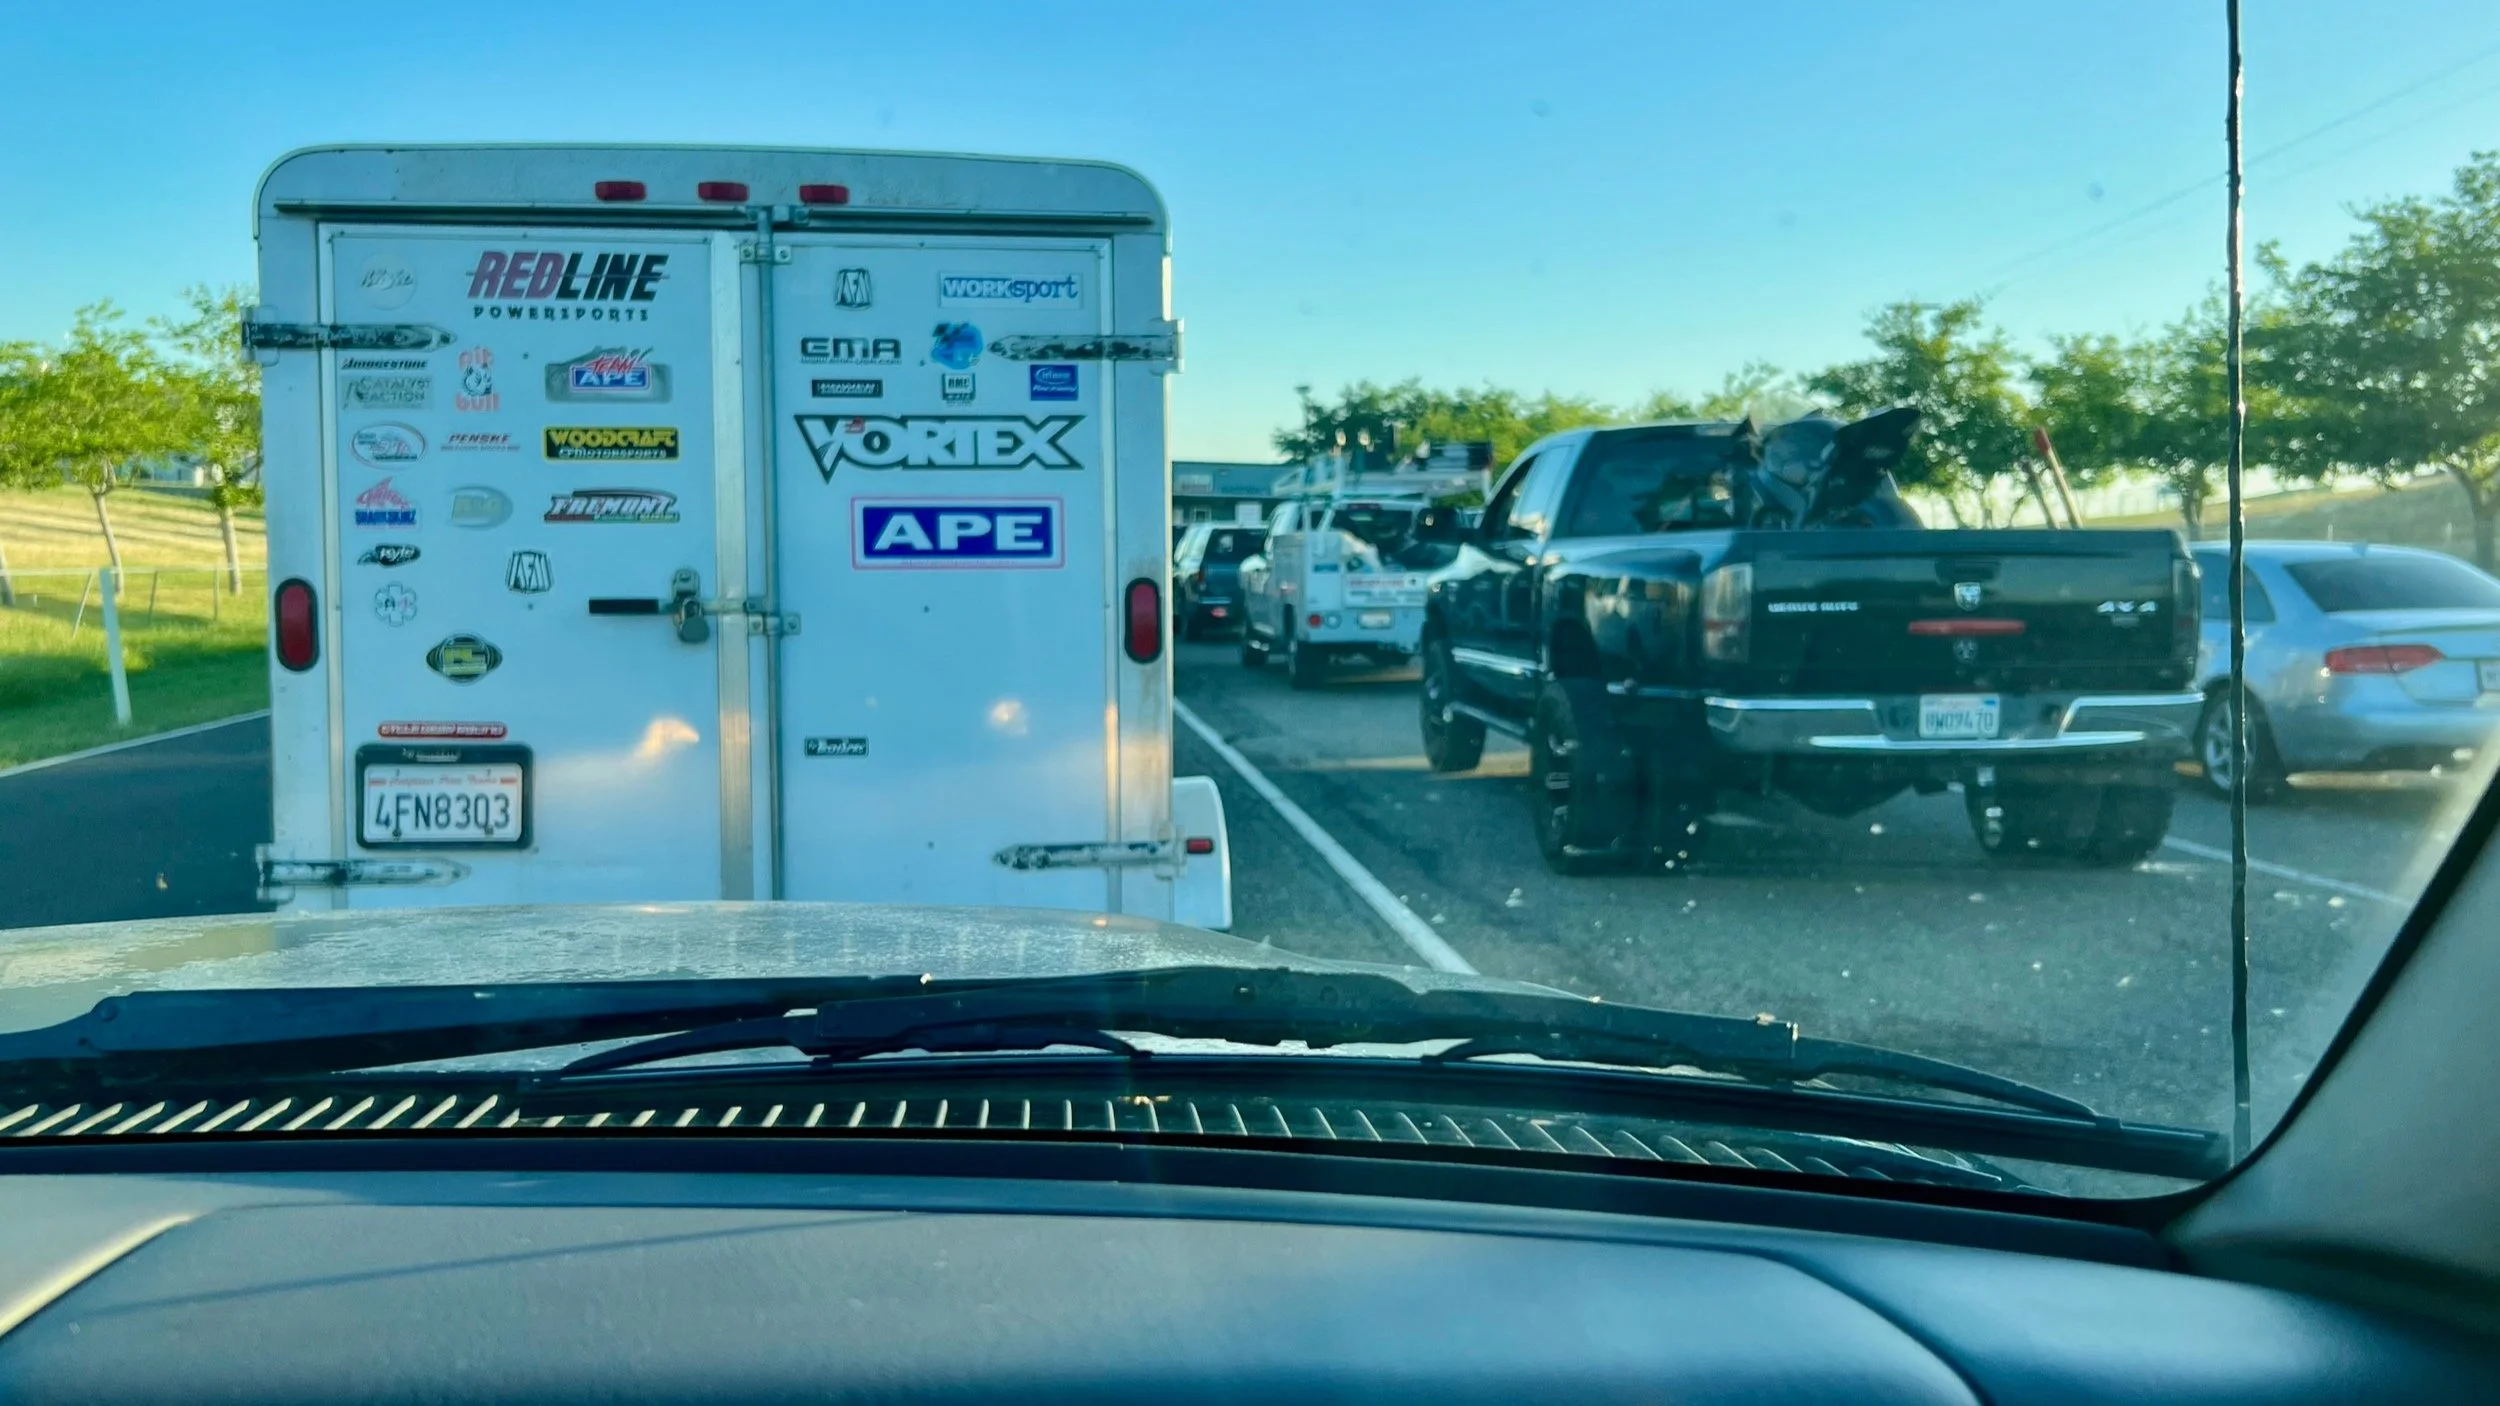
Hauling it yourself is an option for those of us with pickups. One of the main reasons I bought, and still own, my first pickup is to haul the bike. The countless fail videos will give you plenty of “don’ts” for this method—learn from them. Or better yet, follow a good list of “dos” and set your mind and bike at ease. For more information on how to do that safely and easily, see our article, How To Load a Motorcycle in a Pickup Yourself and its accompanying video also shown below.
If you don’t own a pick up or have access to one, and even if you do, and you have a vehicle with a hitch, consider renting a motorcycle or utility trailer. You will see a few of these at any given track day and it is a smart way to go. It can be a bit intimidating to the uninitiated to tow a trailer and your travel time may well be increased as a result of slower speed limits, but there are some great upsides to trailer rental. For one, you can save money on ramps. You won’t need ramps where you’re going because they’re built in. You’re looking at $20 a day or less for a utility trailer compared to $100x2 for ramps. Bonus with a utility trailer, you can haul two bikes. So if you’re going with a friend its pretty handy. You’ll also find there’s room in there for a lot of your gear as well, giving you a bit more room in the vehicle. Use all the tie down advice from above. Unloading couldn’t be any easier. There’s a reason you don’t see motorcycle loading/unloading fail videos involving utility trailers. Less cost and less stress are two great reasons to go this route.

Renting a trailer requires no more investment than a hitch to your vehicle.
Hitch-mounted bike carriers are also a possible solution, though I don’t see many at track days. They appear to be a very convenient way of hauling a bike, but carrying all that weight off the back end of a pickup isn’t ideal. If you’re considering this route, make sure your truck and its receiver are sufficiently robust for the combined weight of your bike and the carrier.
Fortunately you did all this loading with plenty of time to make the drive to the hotel and you’re not rushed in the slightest. Right? Rushing is when mistakes are made and things—often critical things—are forgotten. To help you avoid as many beginner mistakes as possible, I’ve created a checklist for you to download. This covers everything I have ever needed to bring and I use it religiously. On loading day, I live by this thing. You’ll need most of these items, but not all of them. Hard core track rats will need even more, but as a beginner you’re completely covered with this list. If you’ve got it in front of you already you’ve probably already asked yourself, “Who forgets their keys?!” I’ve seen it happen. To other people. Not to me. I have this list!
As you approach the hotel parking lot you might be concerned about the security of your bike and belongings. Don’t be. You’ll likely see another ten trucks there with bikes loaded up. Thieves go after the easiest marks and going after a bunch of bikers isn’t a good move on their part. For once, the stereotype works in our favor.
You’ve arrived
When you reach the gate you’ll be asked to sign a waiver releasing the track of liability. You should be good with this, after all you already ride a motorcycle. You know your life is in your hands whenever you swing a leg over, this should be no different. If you get taken out, the liability is all yours. Put your faith in other riders accordingly.
Its a good idea to get to the track before the gates open to improve your chances of a covered spot in the paddock
Unloading
Proceed to the paddock and find a space to unload. You got here early so you’re going to get a good spot. If you’re extremely lucky you’ll get access to a garage though those are rare. More likely you’ll find some shade under cover, but even more likely you’ll find yourself in the open, effectively a parking lot. If that’s the case, you’re going to be glad you brought a 10x10 canopy with you. When you set up, keep in mind how you’re getting in and out of your spot. Backing a bike into your setup is less than ideal, so try to have a plan to enter one side and exit the other. I prefer to have my canopy beside my truck, but not all situations allow that. Keep your setup compact—you’re going to want your stuff nearby and its common courtesy to minimize your footprint. If covered space is at a premium, be a mensch and park your truck elsewhere in the lot so your fellow rider gets a shady spot. Chat up your new neighbors. 99% of the people I’ve met at track days are more than happy to find a kindred spirit.
Unloading the truck is pretty much the opposite of loading, but it can actually be trickier in some ways. Search your destination for a loading ramp. Some tracks will have these and they make life much easier. If they don’t and you’re flying solo, you’ll be glad you followed my advice and met a few people already. When the time comes for unloading, ask for help. Everyone I have ever asked for help has been more than willing. Nobody wants to see you drop your bike, that’s for certain. Once you’ve got the straps off your bike, put it in neutral and walk it back while covering the brake lever. Make sure your rear wheel is aligned with the ramp and keep the front wheel straight. Bring it down slowly, using plenty of brake. Watch both wheels to ensure they are not veering off the ramp. There, you did it! If you rented the trailer, pffft, you didn’t need any of this unloading advice.
Set up in the paddock under a canopy
Registration and Tech
Soon you’ll be a track day veteran, but first you have to jump through a few hoops put in place for your safety and for the safety of those around you. The first ring in this circus of speed is registration. Walk over to the registration table, sign their waiver, and get your hand stamped.

Seek out the canopy of your trackday provider and walk there—don’t ride—that’s weird
Next up is tech inspection. More than likely it will be near registration. Head back to your bike and slowly ride it over, no need to gear up. Its good to understand what tech is for and what it isn’t for. First off, these are experienced track day riders and racers. Take what they tell you seriously. They’re there to make sure you have made all the preparations I mentioned earlier and do a cursory inspection to catch mushy brake levers, leaking fluids, loose bodywork, badly adjusted chains, and the like. By placing the rider group sticker on your bike and sending you on your way they are not certifying your bike for safety—that responsibility lies solely on your shoulders.
Riders Meeting

The riders meeting helps everyone involved get on the same page
The third ring is the riders meeting. You’re probably going to be the first group out after this, so now is the time to get your leathers and boots on. When they call you over, be prepared to take in a lot of must-know information. I’m not going to get into all of it here, that’s their job. They’ll cover etiquette regarding grids, passing, how to enter and depart the track, and define flag meanings. They may even give you a code word to ensure you actually attended. The providers won’t be the only people working the event. As you’ll learn in the meeting you’ll generally have a tire business, a suspension tuning service, and a photographer. Other services I’ve seen include massage, protective gear sales, and rental bike companies. Speaking of which, if all this business of bike hauling seems like too much, consider an arrive and ride service. What I typically see is a small fleet of Ninja 400s, which are great bikes for a first timer. They can hold their own in an intermediate class as well, with an experienced rider so don’t short change them. They will have gone over the schedule for the day. Generally there will be three groups; Advanced, Intermediate, and Beginner. It varies, but they’re often A, B, and C or even A, B+, and B-. Regardless, they will divide the time between the three groups so you’ll have 20 minutes per hour every hour with the exception of full track closure for an hour during lunch.

Vendors are there to help you with any issues you may come across
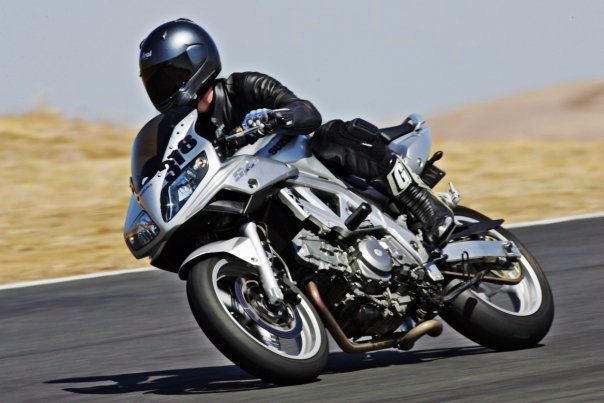
You’re on track
All the planning, preparation, and logistics have led to this moment. Take a minute to breathe and calm yourself to the extent possible. Its going to be fun, but it’s also going to be a bit of work.
First Session
This is what you’ve been looking forward to. After all the preparation you’ve put into making your experience go smoothly, you’re about to go on track for the first time. Get fully geared up. Check that your your boots are fully zipped, your chest zipper is all the way up (in this respect don’t be Quartararo,) your chin strap is fastened, and your gloves are properly fastened. When they call you to the grid, proceed slowly and line up. If they gave you a password to get on track, now is a good time to remember it. As the first group out, you’ll be taking it very slowly the entire time. You’ll have guides to show you the proper lines. Position yourself for a good view of them and emulate their path to the best of your ability. Not only is this the fastest way around the track, it is the safest way. You might be put off a bit by nearing the edge of the track three times for each corner, feeling like you’re weaving all over the place. Generally speaking, the reason for this is creating the largest radius possible for a given corner—the larger the radius, the faster you can go through it. New riders will have a tendency to ride down the middle of the track. Resist this impulse. It makes you slow, but more importantly, it makes you unpredictable. This session will fly by surprisingly fast considering you weren’t going particularly fast. Now you’ve got 40 minutes to process what you’ve learned. Reflect on it. Visualize it. Loosen up, chat with your paddock neighbors, drink water.
Second Session
The other two groups have had their fun and its time for you to put in some hot laps. Keep in mind, you have zero to prove during this or any other track day session. Keep your ego in check. You will be tempted to keep track of who you’re passing and who’s passing you. This is mostly irrelevant. Your goal should be to perform the exercises you’ve been taught up to this point. Ride the race line, glance at the flag towers as you pass by, maintain at least six feet between you and the other bikes on track, be predictable. Loosen the death grip on your bars.
Someone is going to blow past you and probably scare you a bit in the process—this is normal. Just focus on what you are doing. Faster riders need to have confidence that you’ll be on the racing line. True, it is up to them to make sure the pass they’re making is safe, but you have a role in this as well: be predictable. Don’t move over, thinking you’re getting out of their way. The only time you drift off the line is to enter and exit the track or to make a pass. You may be tempted to immediately pass them back. Don’t. They’ve already demonstrated they have the superior pace at this stage. Stay focused on your own riding. You are only competing against yourself.
There will almost certainly be slower riders than you as well. Study the behavior of those ahead of you. Are they riding the racing line or still working on breaking the bad habit of riding down the middle? Or is it the worst possible line, the one right between the racing line and the middle of the track. Don’t be afraid to spend an entire lap knowing you could have gone faster as you study them. You have a lot more laps ahead of you. When you feel you know what they will do, make your pass, preferably on a straight section of track. Repeat lap after lap. Over time, you will find riders that will slow you down in the corners and whack the throttle as soon as they get vertical. Again, this is normal. It may be frustrating, but it is normal. Mentally reframe this as an opportunity. Study their braking points and build your confidence. You may find you can brake later than they do. You may find that if you hang back going into a corner, you can exit fast enough to pass them and negate their power advantage. In the long run you’ll find that these riders aren’t actually holding you back, they’re giving you an opportunity to learn how to carry speed through a corner and that is the ultimate goal. Anyone and everyone can twist a throttle. The magic lies in braking and turning. When you come in, process what you’ve learned. Reflect on it. Visualize it. Loosen up, chat with your paddock neighbors, drink water. Maybe throw down a small snack.
Third Session
This is likely your last session before lunch. By now you’ve got a good idea of the track layout and your confidence is growing. If you set yourself a goal of getting a knee down, scrap it. It looks cool in the photos, but it doesn’t matter today. If you were that fast, you probably didn’t take the time to read this far.
It is time to build on what you have learned from the previous sessions. At this point, the work will begin to diverge depending on experience, but what follows is a general recommendation and one I use to this day nearly 20 years after my first track day. I like to work backwards when learning a new track. By that I mean that I start by learning my line as you have done in your first two sessions. If you are comfortable with that, the next step is to work on building your corner exit speed. Even if you have entered a turn too slowly, you can still make up some time on the exit, but you need to do this carefully. Be forewarned that adding too much throttle too soon in a corner is how high-sides are made. Whether you are experienced or a beginner, the bike does not care. If you spin up the rear tire while leaning the bike, the rear end will attempt to pass the front. If you’re lucky you will quickly low-side which sucks. If you do this and you are not lucky you will high-side and usually it will hurt—a lot.
The key is to always maintain smooth inputs on all controls. You can begin to add throttle earlier and earlier, working up your exit speed until the line begins to carry you to track-out. You have a lot coming at you, so decide which corners you are going to improve on in advance and don’t concern yourself so much about the rest of them. Three to four corners to improve on is a sufficient number, you can work on the rest later. This is not the time to start pushing your braking points. Keep those in an area that you are comfortable with. Worrying about whether you are carrying too much speed into a turn will ruin the entire experience. When you come in, process what you’ve learned. Reflect on it. Visualize it. Loosen up, chat with your paddock neighbors, drink water. Get something light, but filled with protein to carry you through the day—you’ve got up to four sessions left. My go-to from the Thunderhill Grill is the chef’s salad. Maybe swing by the photographer’s trailer and have a look at your photos. Just don’t be overly encouraged or discouraged by them. That is what you look like out there.
The best photo from the author’s first track day. Wow.
Fourth and Fifth Sessions
These are going to look a lot like your third session. Hopefully you’re comfortable with the corners you worked on last session. Continue to get them right and plan for the next three-to-four corners you need to work on. You can continue to do this the rest of the day if you like. Remember, the whole point is to learn and be comfortable at ever increasing speeds. Process what you’ve learned. Reflect on it. Visualize it. Loosen up, chat with your paddock neighbors, drink water.
Sixth Session
If by this point you feel like you have got a good feel for what corner speed you are comfortable carrying, now is the time to work on corner entry. There are two factors that determine corner entry speed; the point on the track at which you start braking and the force you apply to the brakes. You are going to need to decide for yourself what feels comfortable.
By now you have likely seen people begin their braking at radically different points on track. A lot of them will roll off the throttle and coast for a while before applying the brakes. If this resembles you, your assignment is eliminate the coasting. This really doesn’t serve any purpose other than costing you time and inviting people to pass you on the inside. This is how those of us with slower bikes make most of our passes. Sometimes we don’t actually brake later or harder, we just stay on the gas longer. Take note of your braking markers on the track, and by the way pick markers that can’t be moved, like a crack in the pavement, a bridge, anything permanent. Braking markers to avoid include cones, shadows, and action cameras. Anybody find mine yet? I know it’s out there. Back to the point, keep the throttle pinned as close as possible to markers you are comfortable with, be consistent, and have a plan. Are you wanting to carry more speed into a corner or are you trying to brake later to save time? Pick one of these goals—not both—and work on it. Don’t make it a goal to work on your braking on each corner either. Do what you did earlier and pick a few braking zones ahead of time and only work on them.
Seventh and Final Session
My advice is to pack up your gear, stop by the photographer’s trailer and buy a picture (please don’t be that rider who posts water-marked images of their track day), say good bye to your new friends, then travel home safely. Stop for a burger at a decent sit-down establishment and begin your recovery process. Resist the temptation to get that last session in. You may have experienced a bit of nuttiness on the track thus far. That tends to be minor compared to the last session of the day because everyone is tired, their attention spans are shrinking, and for at least a handful of people, they don’t realize it. They want to get that killer knee-down shot they know they’re just millimeters away from. It’s more than millimeters. You’re not going to drag a knee if you only get one butt cheek off the seat, Chad.
If you decide to ignore my advice and take that last session, there are two likely outcomes; a wrecked bike or a set of slow lap times. Your mileage may vary, but I have never reached peak performance in the last session. I am both physically and mentally drained by this point. Consider that you have just spent two hours riding at your limits. Keep your head on a swivel, stop pushing your brake markers deeper, and give Chad plenty of room. You’ll be glad you did.
You Did it!
Your first track day is now behind you. You’ve done what 99.99% of the people on Earth never will. You’re looking up the schedule for the next time you can get on track. You’re hooked and you can’t believe it took you so long to do it. At one point, you swore to your spouse you would never take your bike to the track. You will go on to do like 40 or 50 of track days but somehow she always has something else to do and can’t find the time to join you. Am I being too specific?
The point is, once you’ve gotten over the initial barriers it’s really not that hard. I have two bikes in my garage these days, with the newer one dedicated to the street. I consider it the best purchase I have ever made because it is so good and because it has allowed me to dedicate my other bike to the track. For me there is no more fulfilling type of riding than pushing the limits of myself and my bike on the track.